| |
|
.
And this is my lifesize collection so far!! Hey, who needs a burglar alarm
or watch dog??! :)
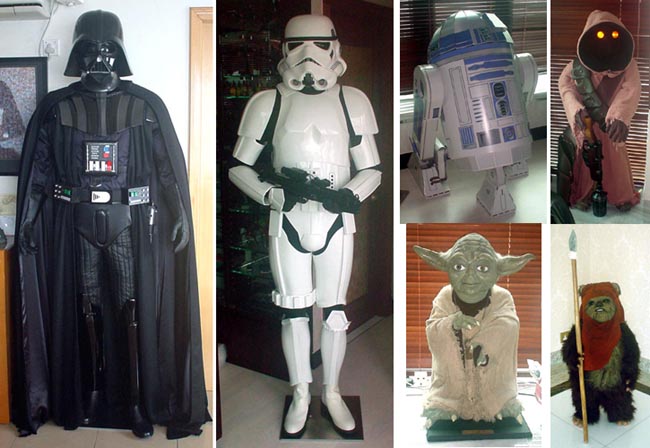
What I have so far is a nearly-completed
Darth Vader, Stormtrooper, Jawa, Yoda, Wicket the Ewok, and a temp. R2-D2!
My next acquisition targets (before I run out of space!) are a Jango Fett
and a "proper" R2-D2. :)
"If
you only knew the power of the dark side...."
| |
Yes, and if you only
knew how long I've been dreaming of having a lifesized Darth Vader!!!
And now, my destiny is almost completely fulfilled!! :D
After a long long time
waiting for the leather shirt, it's finally arrived, and not only
that, I've got new and much more accurate chest armor! So what
you see here is now 97% complete!!! The only thing left to do
is to fix up the collar (right now it's secured by paper clips
and wire), and to do the final hemming of the cape and inner cloak
at the bottom.
What you see there
is (from the top):
-
A
"cking Dark DLX" fiberglass helmet, casted from a
low numbered Don Post Deluxe helmet.
- 90% completed cape,
made by myself out of 100% England wool and satin inner lining,
like the original, and with PVC collar and garden chain (not attached
securely yet);
-
Chest
armor and shoulder bells made by Phoenix Vader.
-
Leather
shirt and trousers by Katarra Kreations, polished to a shine
and wrinkled by me;
-
Inner
robe by myself, made of 100% England wool;
-
-
- Cod-piece by Dark
Shadow, modified slightly by myself;
- Gloves by Galaxy Trading,
but trimmed 2" to make it shorter and more like the movie
version;
- Shin armor by Galaxy
Trading, painted by Vaderpainter;
- Locally-made cheapish
ankle-high leather shoes. (They should be knee-high leather boots,
but since you can't really see them anyway! :)
|
For those of you who have been
here before and have seen my previous version of the Vader, below you
can see a comparison of the two. The main differences are as follows:
-
HELMET - Previously, I
had the Don
Post Deluxe, #652. The one here is much better than that. Firstly,
it was cast from a very low number Don Post, so the neck flare is
much less. Secondly, the DP had the two-toned paint scheme on the
face plate reversed, whereas this one is now made correct, not to
mention the paint job is much better (I'll take close-up pics one
day). Thirdly, there is not only a larger grill in the mouth vent,
but also an inner grill mesh, like the real deal. Fourthly, the 'tusks'
are now properly shaped alluminum 'sensor billets' instead of just
painted clumps, which was what the DP had.
- CHEST ARMOR - Previously,
I was using a Galaxy Trading armor, painted by Vaderpainter. The paint
job was the best thing about it, but the armor is critically flawed
in that it was too narrow, and the shoulder bells were too short and
did not line up with the chest armor. With this new one, the width has
been corrected to be as wide as the original armor, and the bells and
larger and line up propoerly. The paint job is pretty nice too.
-
I have finally got the
leather shirt! It was originally sent back to the maker to make bigger
in order to fit my huge mannequin. This time, I polished the leather
to give it more of a shine, and also made sure it had enough wrinkles
on it, just like in the movie.
- Oh, and it's now in my new
place. :)
Ignore the collar in my new
Vader. It'll be fixed soon!
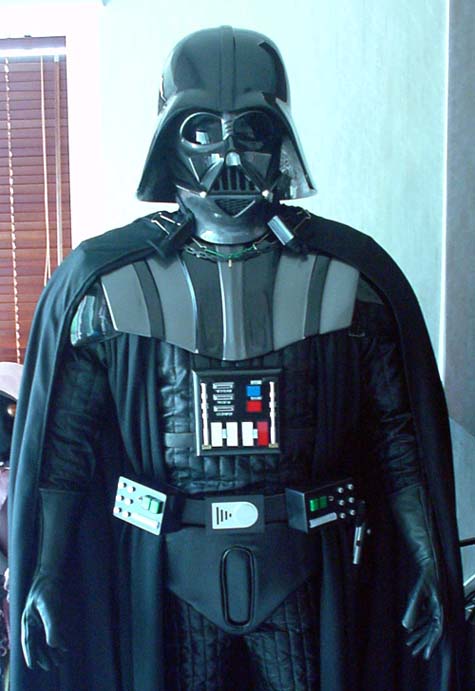
This Vader is built on a 6'6"
mannequin (Dave Prowse was 6'7" in his Star Wars days). The mannequin
was very skinny though, so I had to bulk it up all over A LOT.
You can't really tell from
the pictures, but he is HUGE!!!!! With the helmet and boots on, he stands
at 6'9"!!! Standing in front of him, you really know that you don't
wanna mess with him!! :
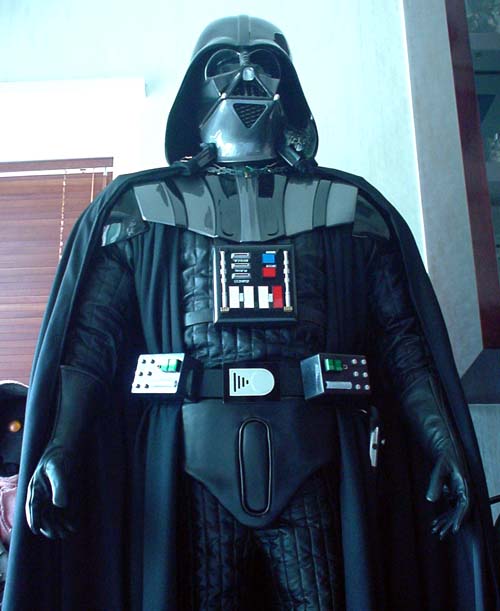
(Luke's eye-view
when standing in front of his father... :) )
| |
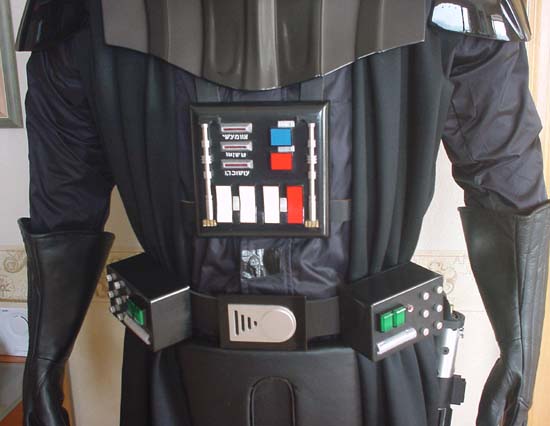
Here's
a pic of my old Vader, showing the chestbox and the belt. The
belt can be lit up like in the movie. As for the chestbox, I haven't
installed the necessary electronics yet, so no lights there. I
also modified the chestbox in various places to make it more accurate,
including putting black outlines on the rocker switches and buttons,
and most importantly, changing the writing under the 3 "coin-slots".
The writing is based on what is seen on the Vader in MOM (Magic
of the Myth), and is actually Hebrew. It supposedly means, "His
deeds will not be forgiven, until he merits".
|
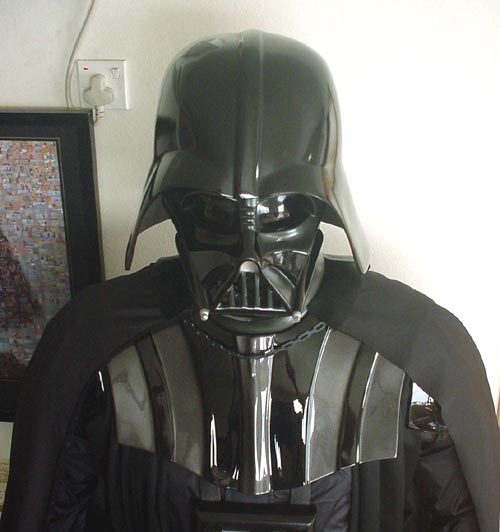
(Above: Closeup showing
my old Vader, with the DP Deluxe helmet and old Galaxy Trading
armor.)
.
|
| |
"Move
along, move along..."
| 
|
And
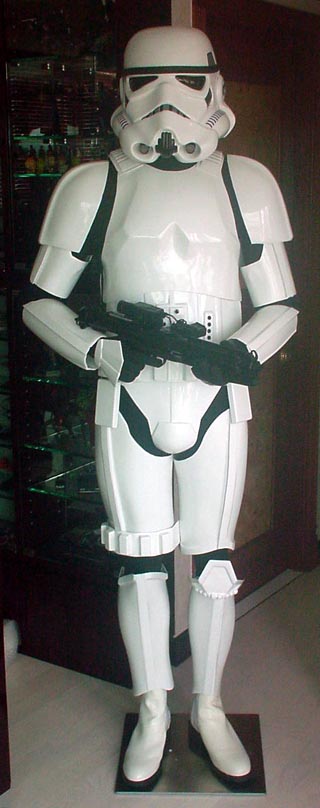
here is an ULTRA-RARE and 100% accurate lifesize replica stormtrooper!!
This is not the commonly-seen Armor F/X
or Galaxy Trading versions you see worn by around 95% of all fan
troopers. Unlike those suits which were originally sculpted from
reference pics, the suit you see here was cast from an ORIGINAL
SCREEN-USED stormtrooper suit in Star Wars Episode IV: A New Hope,
and so what you see here is 100% accurate, just like what you see
in the movie!!!
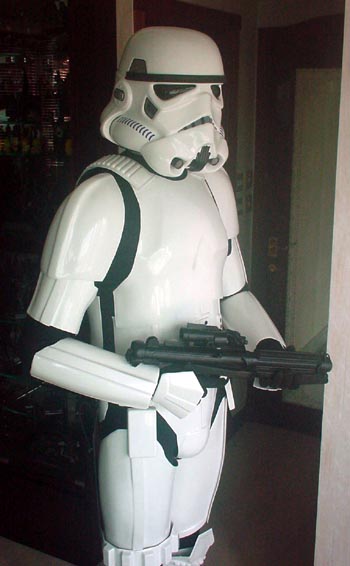
<---
Note: The right shin guard looks bigger cos I couldn't
shut it properly at the back, due to the mannequin stand "prong"
that goes into the back of the right calf.
|
| 
|
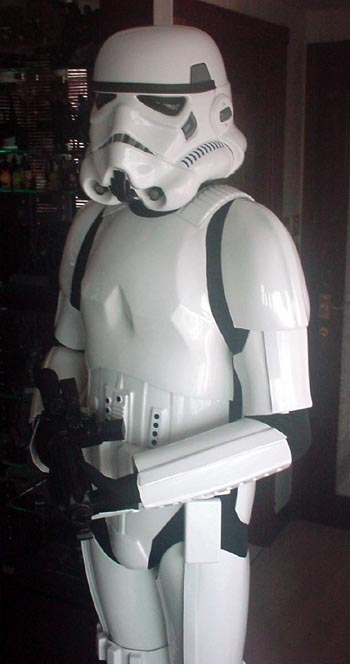
This
set was produced quite some time ago shortly before Lucasfilm clamped
down on it, and I am very fortunate to own a set, as these are now
nearly extinct and not produced anymore. Luckily, I also got hold
of a spare set of this armor, which I just MIGHT one day consider
letting go of. ;)
This is a wearable stormtrooper
costume. After obtaining the armor (and trimming to size), I placed
it on a 6' mannequin (along with some dance leotards, gloves and
boots). The trooper
stands about 6'2" tall, which would probably prompt Leia to
say, "aren't you a little tall for a stormtrooper?" if
she ever saw this. :)
(I think the 'right' size for a stormtrooper is probably around
5'10".)
The mannequin has flexible
arms, which is great as it allows me to pose the trooper holding
the blaster.
The armor is made of
glossy white ABS plastic. I spent a lot of time, labor and sweat
on it, carefully trimming the pieces, drilling the necessary holes,
and painting the necessary pieces etc. to make it ready to wear.
I also had to bulk up
the trooper as it was too skinny (like my Vader). (What's with these
anorexic mannequins?? Don't they get fed in the factory??) |
_________________________________________________
"UTINNII!!
Crry---yaai--yai-yaii...."
| |
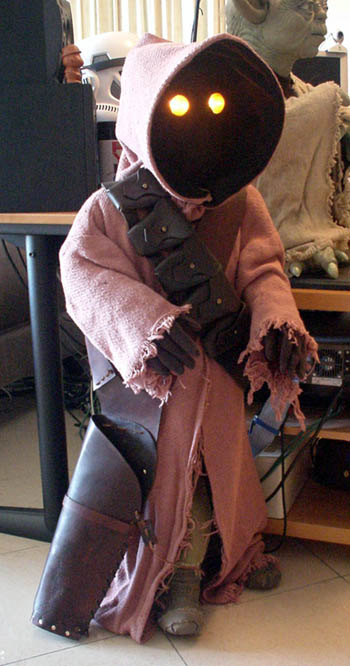
This ranks as one of
my favorite lifesize items - she's so cute!! (since no one can
tell for sure, I've decided that it's a "she"... :))
She was made by Dustin
Crops Boy with high precision to resemble the ROTJ version, which
has a lighter brown robe than the ANH version.
She stands at 3' 4"
tall.
The eyes light up with
the help of a switch, and perhaps someday soon I'll get it to
be motion-activated, along with a sound card unit that will make
her speak!
The robe is made from
a Ralph Lauren King-Sized blanket dyed brown, just like the original.
The gloves are brown
jersey gloves, just like the original.
The bandolier is a
British pattern 1903 leather bandolier, just like the original.
The holster is a home-made
one made of real leather.
Notice the jawa has
an inner robe and bandaged feet.
I modified her a little
by adding a bit more bulk to her body, which was also very skinny
originally.
|
Some older
pics (blaster not shown):
|
|
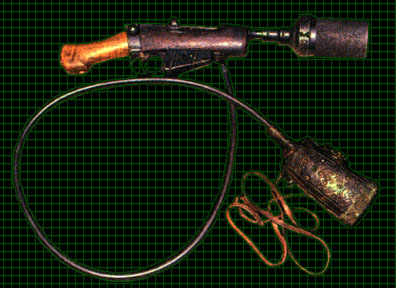
And here's his ultra-awesome
R2-immobilizer, the Jawa ION blaster!! Made by the very talented Moncal
(who's, btw, also an excellent country singer/musician!). It's made from
a real Mk3 Enfield 303 caliber rifle. Coincidentally, this blaster arrived
at the most opportune time for the Jawa - the same time as my lifesize
R2 (see below), for her to shoot down! :D


And here's a picture
of the real thing (pic courtesy of Parts of Star Wars) to show
you how awesome this replica is:
"Judge
me by my size, do you?"
This is the ultra-rare lifesize
Yoda made by Illusive Concepts!!! It is numbered 8600 out of 9500, but
does not come with a certificate, and has lost its cane.
It is made of
latex like the real thing, and has real goats hair on his head. It is
26" tall.
The one you see
above has also had its eyes replaced with more life-like silicone eyes,
and has Yoda's 'necklace' (actually supposed to be a flute).
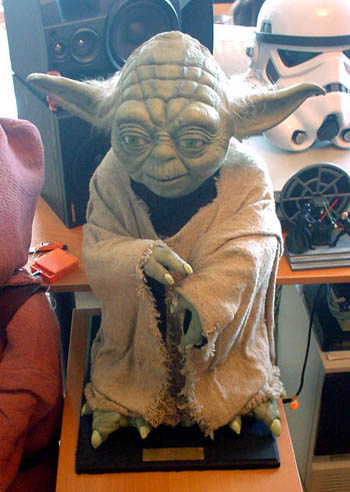
| Here's
Yoda before the eye change and without the flute on his neck.
You might have also noticed
that I have repainted his nails to look more realistic. Before,
they were just green like the rest of him.
|
|
"YUB
YUB!!! "
| |
I must
first declare that, I've never been a big fan of ewoks. However,
after I saw this, I knew I just HAD to get it!! It's just too
cute not to!!
This Ewok
is Wicket Warrick, and is made by an INCREDIBLY talented artisan
known as Ronculus. He only made a handful of these, and mine was
the last to be made.
This Wicket
stands at 2' 8" tall, and was partially tailor-made to my
directions, particularly to ensure that it had a big enough beer-belly
and butt. After I got it, I also made slight alterations to the
cowl, as well as giving him an all-around haircut cos the original
hair was a bit too long, IMO. (you should have seen my room after
the haircut - even worse than a hairdresser's! :D).
BTW, the
crappy spear you see there is made by myself from a cheap mop
stick I found (and the white string you see is actually the mop
strings! Economical, eh? :)). The stone is epoxy putty on cardboard.
One day I must find a real stick of wood from the forest, and
also a real stone.
Anyway,
I'm more than pleased with this ewok. I actually have not seen
a better lifesize Wicket!
|
I think we all
know who ate the pie!!!
"&*^%$
$#@><!!"
(translation: "Haha! You're naked!!")
Apart from a lifesize Vader,
one of the other things I've always been longing to have since I was a
child was a lifesize Artoo Detoo. I've been (and am still) on the lookout
for a good quality and affordable R2 (also some spare cash :)), but in
the meantime, I thought I would save his place in my studio by getting
a nice cheap clone!!
This R2 is made by Dorling
Kindersley, out of cardboard! It's amazing to think that when I bought
this R2 new, it came in a flat box with a few sheets of cardboard! The
R2 was put together mainly by just folding the cardboard in a specified
way, with not even any glue required!
I still have some things I'd
like to do to it to make it look nicer, like put an undersheet beneath
the dome to make the seams leess obvious.
Anyway, hope this R2 will do
for now as my jawa's target-practice... :D
DON'T
FORGET TO LEAVE
A MESSAGE ON MY GUESTBOOK BEFORE YOU LEAVE!!
|
|