The
COLLECTION
| OLD
SITE | PREVIOUS
PLACE - 360 VR | EMAIL | |
|
The
|
|
COLLECTION
|
|---|---|---|
|
. |
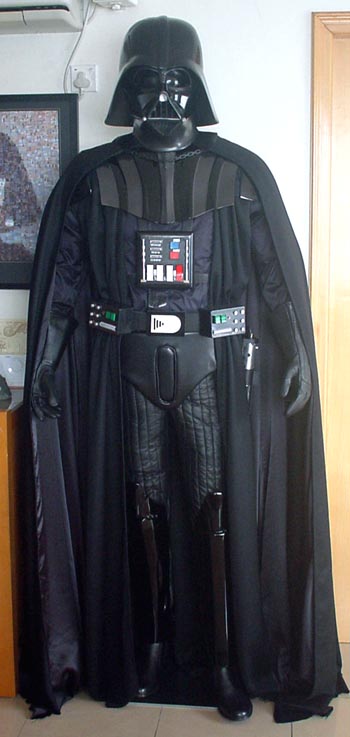
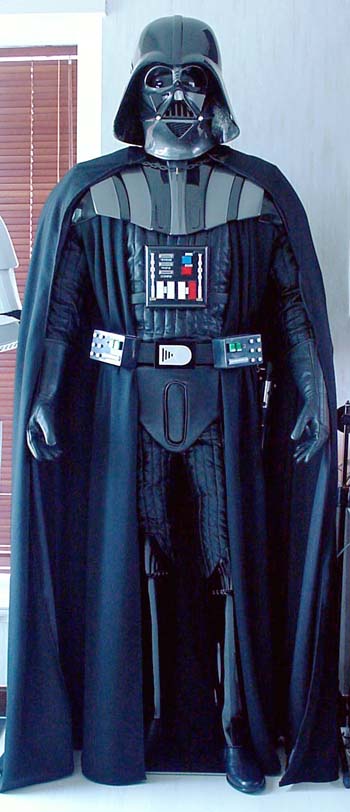
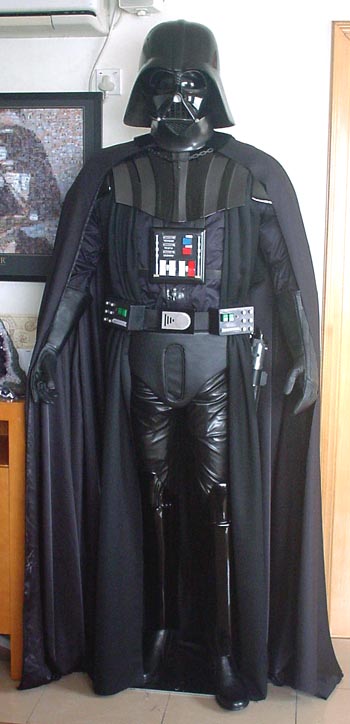
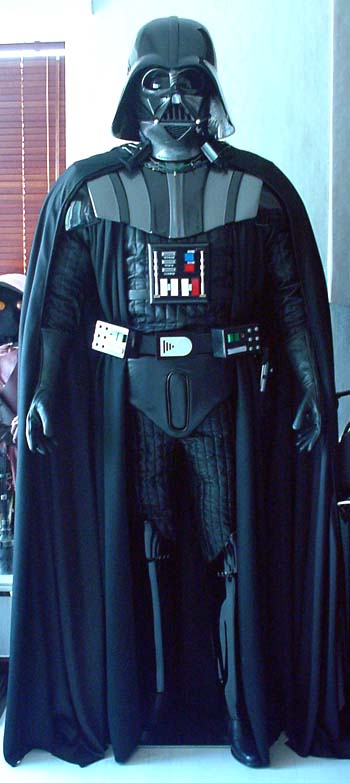
LIFESIZE DARTH VADER - ADDITIONAL PICTURES | |||||||||||||||
| . For those of you who have been here before and have seen my previous version of the Vader, here you can now see a comparison of the two:
The main differences are as follows:
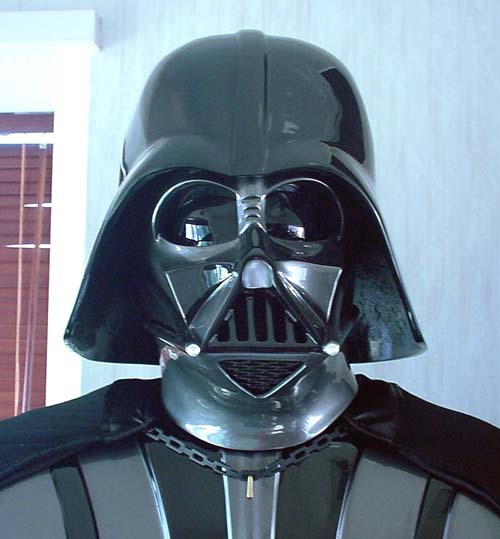
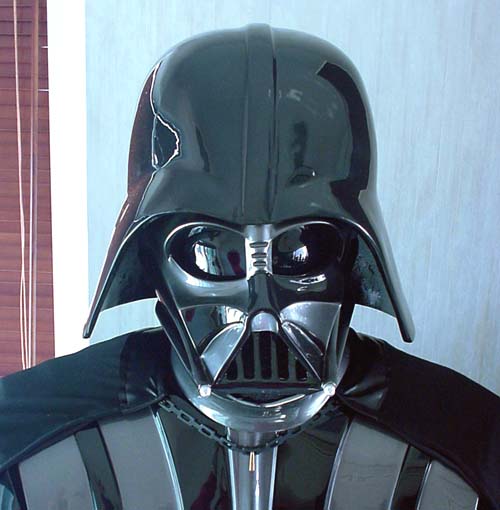
Here are more pics of my Vader:
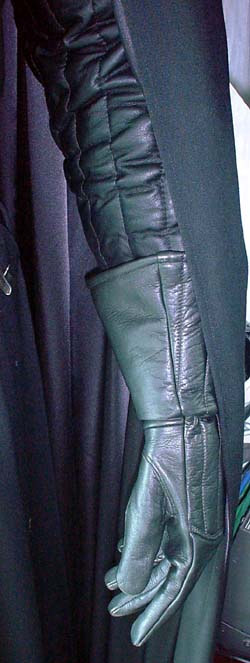
Note that since the pics were taken, I've improved the look of the gloves by adding a "fold / crease" at the wrist area, like what you see in the original:
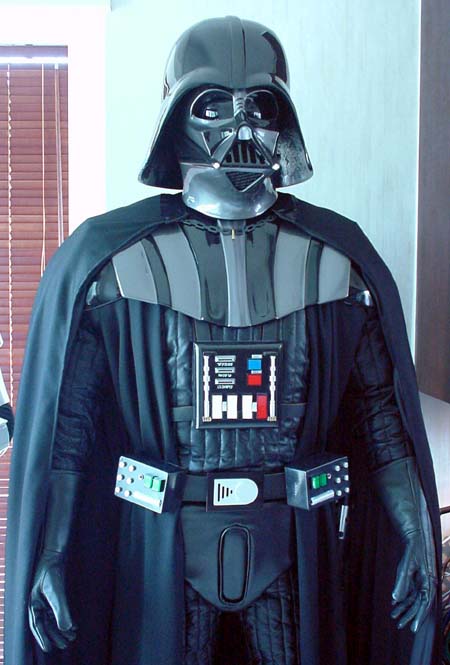
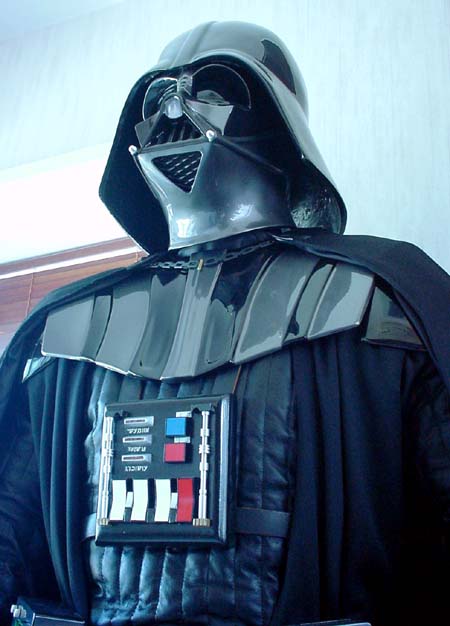
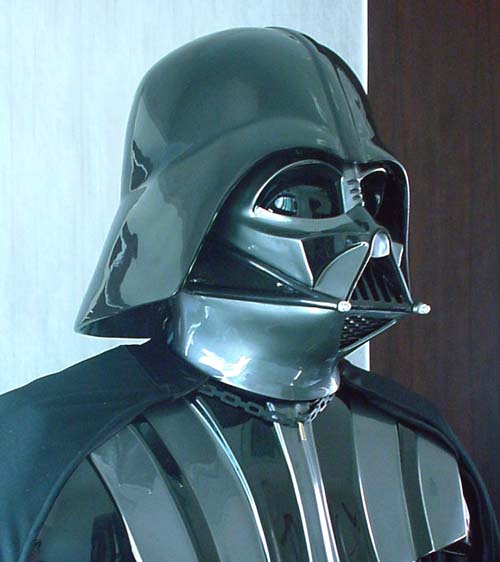
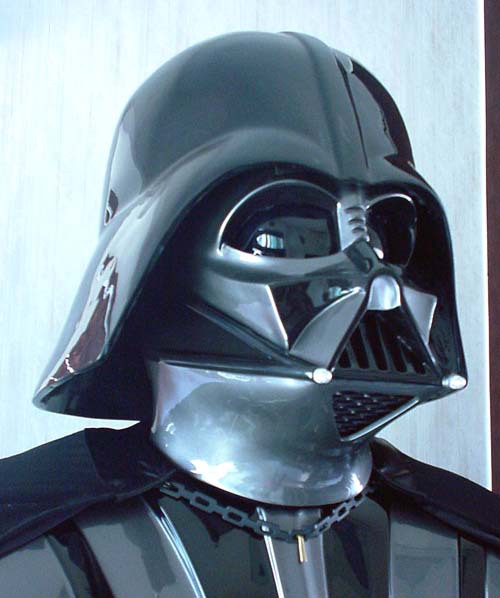
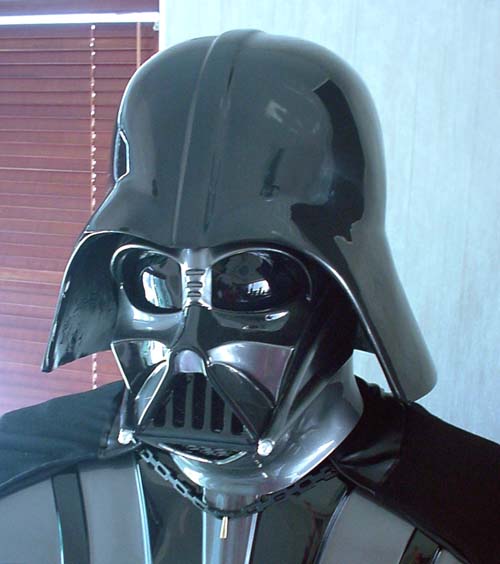
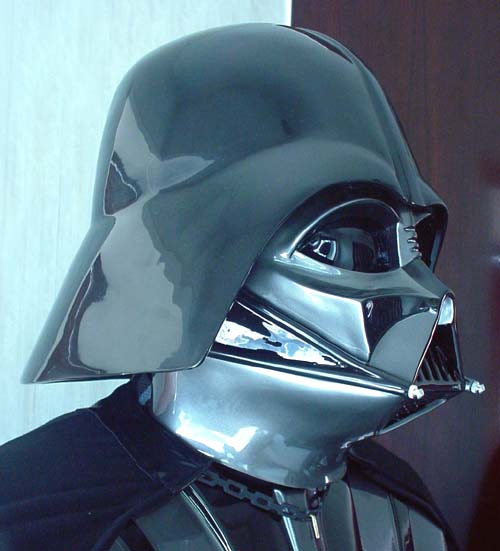
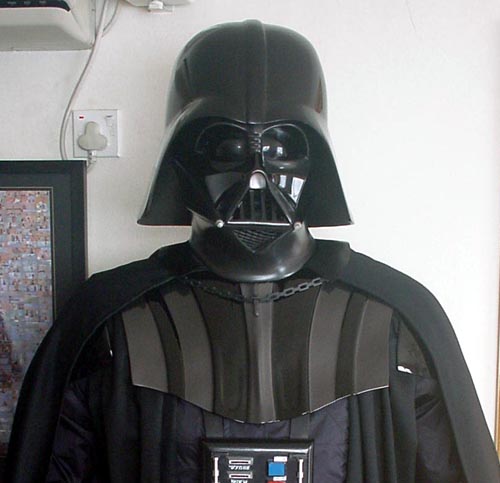
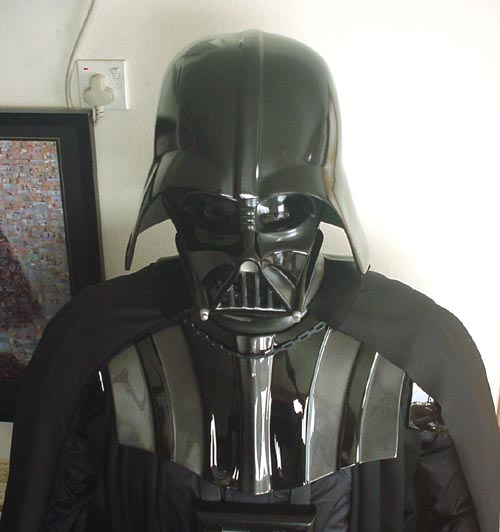
And here are close-ups of the incredibly excellent "Cking Dark DLX". Check out the correct two-toned paint scheme, and the awesome finish.
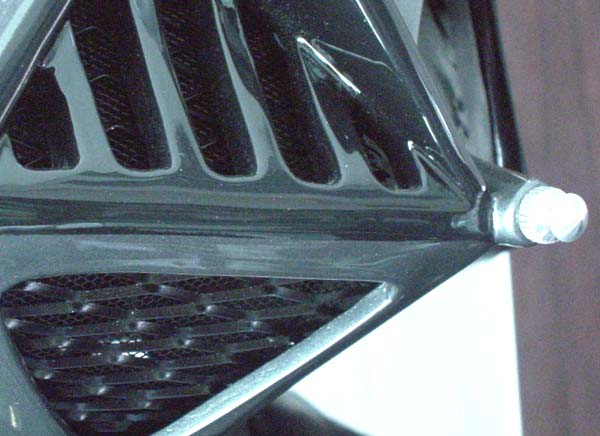
(Notice the "tusks"/sensor billets - not just silver clumps like the DP Deluxe)
(Notice the outer and inner grills.)
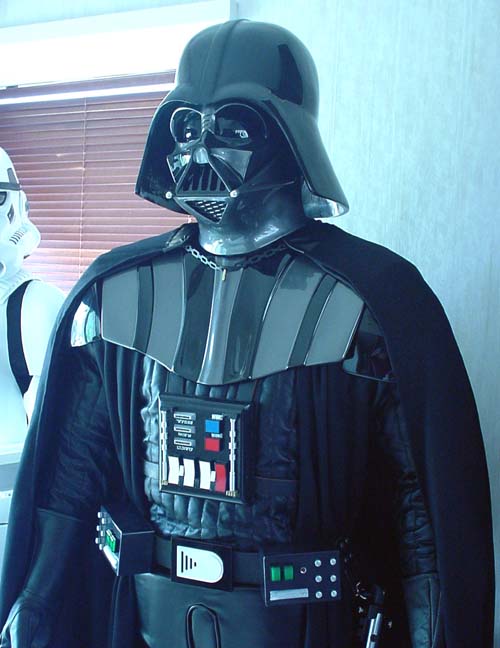
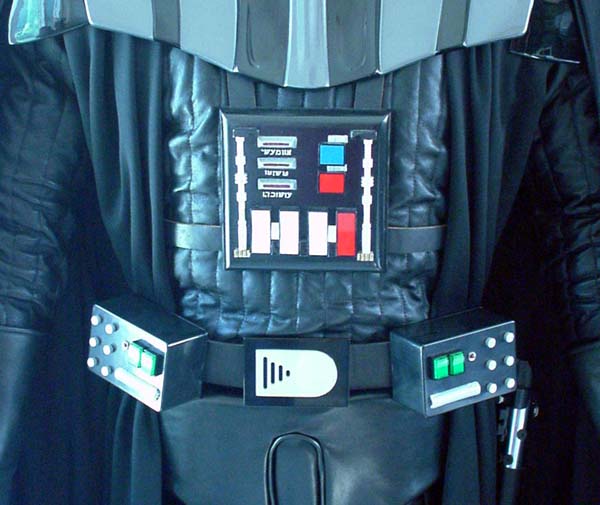
Here's a pic showing the chestbox and the belt. The belt can be lit up like in the movie. As for the chestbox, I haven't installed the necessary electronics yet, so no lights there. I also modified the chestbox in various places to make it more accurate, including putting black outlines on the rocker switches and buttons, and most importantly, changing the writing under the 3 "coin-slots". The writing is based on what is seen on the Vader in MOM (Magic of the Myth), and is actually Hebrew. It supposedly means, "His deeds will not be forgiven, until he merits".
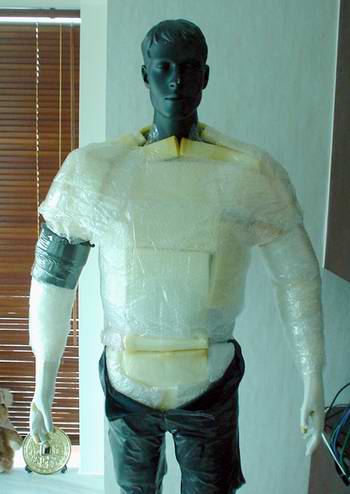
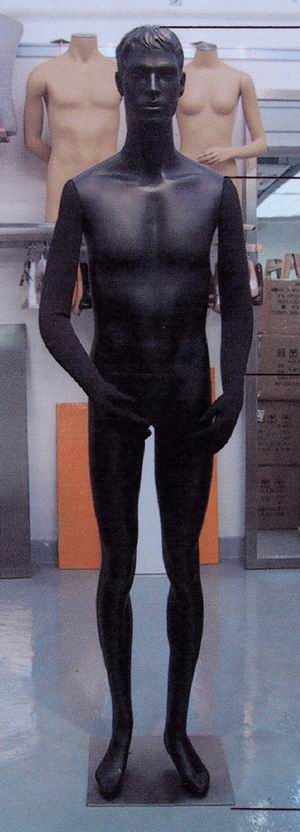
OK, this section deals with some of the questions I commonly get asked about how I made my Vader. I'm only commenting on the mannequin, cape and robe. For the rest of the parts it's best to buy the required parts than to make. I didn't want to buy the cape and robe cos I wanted them to fit my Vader perfectly. MANNEQUIN
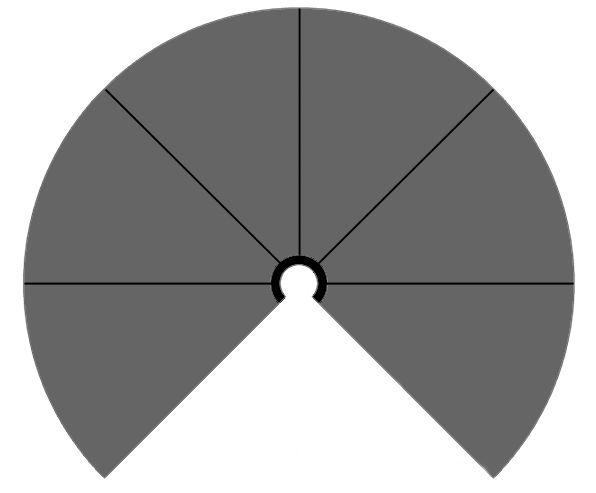
CAPE Firstly, I am using diagrams which collected from the Net a long time ago. I'm sorry I don't know who they belong too, but if you let me know who you are I'd gladly credit you here (or take off the pic if you want). OK, conventional wisdom says you must come up with a "Pacman" shape thing with a total of 270 degrees, like shown below. Some sites say that you can do this with just 2 pieces of cloth (each with 135 degrees), whereas some say 6 (each with 45 degrees), like this:
This is what I
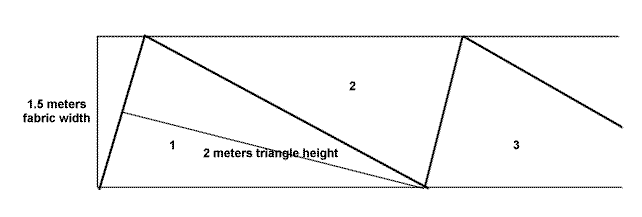
say. :) So, many people acknowledge that you would need to cut down the angle from 135, to something like 45 degrees, which means you would need 6 pieces. This is fine, except you would need your cloth to have a width of at least 60". Here's a diagram showing how you would cut the cloth. You can also see now why the width of the cloth will determine the maximum angle and height you can get up to.
Now, what I have found is that with a total of 6 pieces @ 45 degrees each (270 total), it's just way too much. What I did was to take off one of the triangle pieces, leaving me with 5 pieces for a total of 225 degrees. I feel this is probably about right. Even if I close my cape more to cover the shoulder bells, there is still excess cloth behind. After discussion with someone from ILM, it seems that the capes were around that angle too. Anyway, you will need to construct the cape in two parts: the outer, which should be made of wool; and the inner lining, which should be made of satin. Other bits:
Once you get all the pieces cut into shape and all the parts ready, then sew it up or, like me, pay a seamstress to sew it up for you. It's best to do it in stages. Make sure she leaves the length unhemmed first. Then after the first sewing, put it on the Vader and mark out the line where it touches the ground, and trim to fit. Then take it back for the final sewing/hemming.
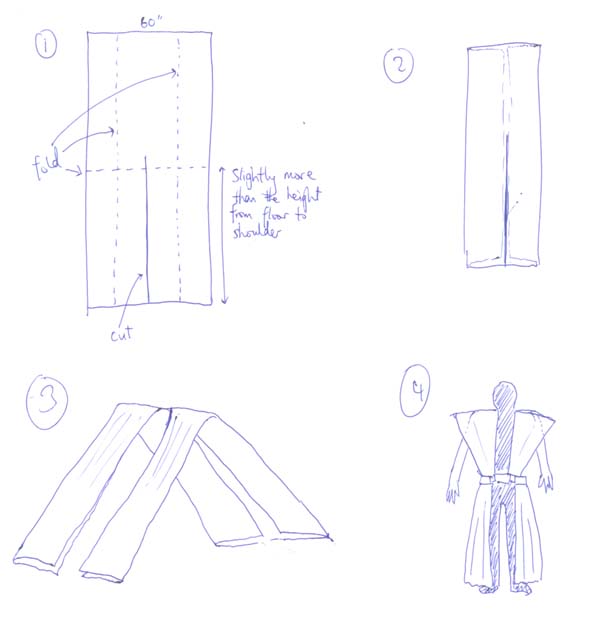
INNER ROBE Firstly, please excuse the crudity of the diagram. I did it some time ago for someone else and did it in a rush. The diagram should be self-explanatory. The key to a good-looking inner robe, I believe, is that it must have the right amount of cloth in order to get the thickness and folds that will make the Vader look authentic. Most often you will see just a piece of flat cloth beside the chestbox covering the sides, which will make it look unauthentic. So below, you can see that I have used the full length of 60" cloth (same "cotton-like" wool material I used for the cape), which enables me to give the cape a double-layer thickness. Even after folding it over to give two layers, you will see that it still sits very wide on the shoulders. This will enable you to really scrunch up the robe and give it maximum amount of folds. Make sure you push the robe outwards as much as poss. This will give it maximum folds, and also reveal more of the leather suit which you spent a bomb on. :) Similarly, make sure you get enough folds under the belt.
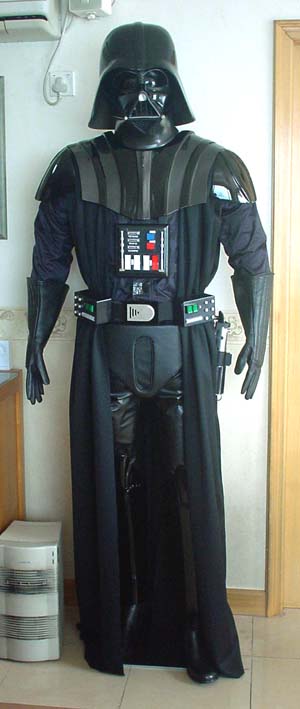
Below you can see how my Vader evolved.
____________________________________ For old times' sake, here are some closeups showing my old Vader, with the DP Deluxe helmet and old Galaxy Trading armor:
|
| OLD
SITE | PREVIOUS
PLACE - 360 VR | EMAIL | |